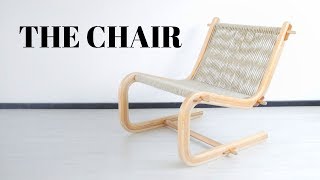
Making The Chair
Channel: lignum
Category: Howto & Style
Tags: curvedcurved chairdiy curved woodropearched loungerdiy bending woodwood artcurved wood moldingmaking wooden chairoverturetime lapsemodernelastic chairwooden loungerdiyfurniturewooden wedgesloungercurved loungerhandmadelaminated beam diylounge chair1812curved woodhowtowood bending techniquesrope chairtchaikovskydeck chairwithout steamcurved beamscontemporarystep by stepwood bendingwood bending jig
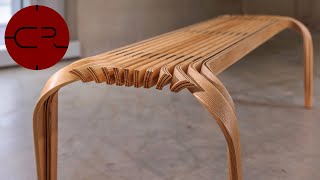
Description: I started by drawing the outline of the chair on a thick piece of plywood. After the shape was complete, I traced the inner part of the mould on pieces of spruce beams I had left from another project. Excess wood from the pieces is trimmed on a band saw and all is then glued onto plywood. Slats I used are 2 mm thick and are made from oak and larch wood. first the boards were trimmed, then cut to width and then cut into thin pieces using a mini multi blade saw. Pieces are 2.3 mm thick and sanded to final 2 mm using a calibrating belt sander. all slats are glued together in a mold using a two component melamine glue. After the glue is cured , mold is disassembled, curved piece is trimmed and cut down the middle into two parts. As a back rest, I decided to use hemp rope woven between three turned oak pieces. Oak pieces are guided through holes on side pieces and held in place with walnut wedges. All wooden parts are sanded down to smooth surface and two coats of epoxy varnish are applied with light hand sanding between two coats. Don't forget to subscribe and like if you enjoyed the video! :D My instagram: instagram.com/lignum_channel/?hl=en My facebook:facebook.com/lignumchannel Music:1812 overture by Pyotr Ilyich Tchaikovsky