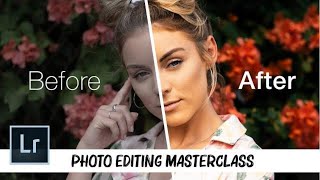
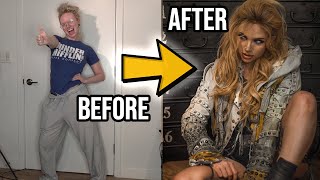
How To Make Your Subjects POP! in Lightroom - 4 Easy Steps
Channel: andrewtkearns
Category: Education
Tags: brush toolandrewtkearnshow tolighroomlightroom classiccommercial photographystokedadobeadobe lightroomhsl panelmaclightroom 2021editinglightroom ccphoto editingstep by stepbrand photographytoyotatacomaphotographertutorialautomotive photographylightroomphotography
Description: Wildist Workshop 👉 wildist.co/?via=kearns * I do get a commission off each sale through this affiliate link. This helps me continue to make more videos like this & put more educational content out there. ---- Time Stamps: 0:48 / Base Edit 1:50 / Step 1: Brush 2:24 / Step 2: Brighter Subject, Darker Background 4:38 / Step 3: Sharpness & Clarity 8:54 / Step 4: Complimentary Colors 15:27 / Before & After #1 16:05 / Before & After #2 (Final Adjustments) ---- It's important to systemize your editing. I used to not have a step-by-step way of editing & while I usually ended up with what I wanted, I always knew it could be better. With this step-by-step guide, you can follow this order to make your subject POP - whether it's a truck, a person, an object, it doesn't matter. You can use this step-by-step method to draw attention directly to your subject. No one panel or slider will get you that POP you want from the subject, while the brush tool carries most of the weight here, it comes down to a lot of subtle adjustments within each slider. It takes a lot of tweaking, sliding, & patience to get what you want, but having a step-by-step method will help you expedite that process, knowing what you will try next & what the goal is crucial to achieving the outcome you want. Let this guide help with that. All of this & more is available in my workshops 👉 There's also ample educational material here on my channel 👉 Like this video & subscribe for more videos so I can keep it going, & please leave any feedback in the comments. Big thanks!