Dining Room Table from CNC Milled Logs - pt. 2/3
Channel: Rainfall Projects
Category: People & Blogs
Tags: how tomilling logscncrouterpartssketchupsalvaged woodmortise and tenonfarm tablevectriccnc router partsmillmetalworkingdining room tablevcarverusticwoodworkingcnc routerdiymilling woodbarnreclaimed tablecncfarmworkbenchtable
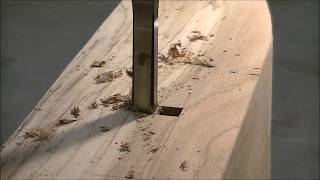
Description: Follow Drake and me on Instagram: @jdeechambers 2 Part Epoxy: amzn.to/2Tda2y5 Epoxy Pigment: amzn.to/2WjP4zG Switching over to the legs, I square up and clamp down 8x8 beams to the CNC routing table and start milling them down to 5". In Vcarve, I set up the toolpaths for notching out the mortises and profiling the outer shape of the leg. Since the router bit will only cut 2.5" deep, I need to utilize the double sided feature so I can flip the leg over and run the same toolpath, in order to cut all the way through the 5" leg. I also cut out the arch pieces, from a 3 laminated 2x12s. With all the pieces cut, I sand everything down and get to work gluing together the end sections. While they dry, I switch back to the tabletop which gets a cleanup surfacing pass and 2 part epoxy to to fill in all the cracks and holes. Once it has dried, I surface the epoxy off, leaving it just in the recesses.