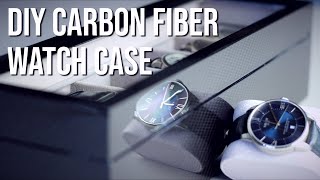
Carbon Fiber Watchcase - Veneer
Channel: Matthieu Libeert
Category: Howto & Style
Tags: how togluecraftprojecteasy compositesboxveneercoverpermagritfiberglasspolyesterglosstissotcarbonwoodtutorialbelgiumaudemarcasejewelrymat2skinningfiberseamlessluxuriousepoxymake apermabondhublotcheapiphoneexpensiveresinaresinwatchcasewallnutwatchrolexmercierluxurybaume
Description: Hi Everyone, my name is Matthieu (MAT2) in this tutorial I’ll show you how I veneered or skinned a watch case with carbon fiber. I call this carbon fiber veneering as we’ll be using just a thin rigid sheet of carbon fiber to skin the entire outside of the watch box using basic tools like clamps and epoxy glue with the plates we’ve made in the previous tutorial using the resin infusion technique. If you missed that tutorial and want to watch it again: youtu.be/lH0fO-3Y2XA the watch case is a wooden case I bought on amazon for €25. We’ll need some carbon fiber plates as well. Like mentioned I’ve made these myself. The good thing is that you can buy carbon fiber plates for a good price online! If you’re looking for some good carbon fiber plates you can find them on following link: @Easy Composites Ltd easycomposites.co.uk/#!/cured-carbon-fibre-products/rigid-carbon-fibre-sheet/High-Strength-Carbon-Fibre-Sheet.html A few extra remarks for skinning parts with plates: Buy them as thin as possible (here 1mm thick) Second important thing is to have them “single sided” you want a peelply finish on the back and not double sided gloss. Double sided gloss might work as well but you’ll have to sand the back with 80 grit sanding paper for a good bond while gluing the plates on your project. The peelply finish is made exactly for having a good bond while gluing them on parts. First remove all the internal compartments as I don’t want to damage any during the process. A second important thing is to protect your glass. This is a part of the case that, at no point, you’ll want to repair/replace. Once sanded with light pass of an 80 grid sandpaper to remove the surface finish and have a nice piece to start with without any possible contamination of materials. The second important thing is that we sand the piece to have a good mechanical bond for the glue. The carbon fiber sheet can be cut in different ways: You could use a sharp razor blade Stanley knife, figure saw, band saw or my favorite tool for this a Dremel with a permagrit rotary blade. This is a carbide tungsten coated grinding wheel comparable to diamond coated tools. Very important to know is that carbon fiber can be aggressive on your tools. Meaning that your tools dull out quickly while using them on carbon fiber. Templates are made and we can proceed to gluing the plates on the part, being the watch case here. For the glue we’ll be using a 2K epoxy glue called “Permabond ET500” for more information click on following link: easycomposites.co.uk/#!/resin-gel-silicone-adhesive/structural-adhesives/rigid-5min-epoxy-adhesive.html This is a fast setting epoxy that will cure in about 5 minutes after being mixed in the nozzle. Full cure is reached after 24 hours. The adhesive is put on the part and spreaded out followed by placing the first piece of carbon fiber veneer. As you can see the piece is a bit oversized. This is be sure everything is fully covered even when the plate would slide a bit under the clamping forces. Once cured the clamps are removed and the first layer of veneer is trimmed to perfect size of the box. First using the bigger tools to remove the biggest part (permagrit sandig block) followed by a bit of sanding to level it all to perfect size of the box. Keep in mind that while veneering the box, the carbon fiber has a 45 degree line visual, keep that pattern throughout your placement of the veneer. Also a thing that needs to be mentioned is that the veneer has a thickness so make a planning before you start to know what plates need to be glued first before adding another one in front to hide that thickness of the first layer applied. I decided to have to front part as 100% covered over the edges of the sides, so had to apply the sides first and then the front veneer. Once all sides are done you might still have a few small gaps. These can be filled with a bit of black tinted epoxy or in my case some black tinted polyester bondo/filler. The part is sanded till a 600 grit. Using a small spot repair gun with a 0,8 nozzle to apply a first coat of 2K clear. This coat fills any deep scratches or pinholes in the carbon fiber sheet. This coat is fully cured for 72 hours then sanded with 600 + 1000 grit. For the final coat I’m using a bigger spray gun (nozzle 1.2) a apply a heavy coat of clear to create that glass finish. This would be called flood coat in painters terms. As mentioned in the video, I’m not a professional spray painter but I manage to get OK results. Keep in mind that I’ve used a 2K clear coat here but you could get good results with 1K clear spray cans as well. Why 2K? it’s more resistant to scratches and UV light. You now have a nice carbon fiber watch box to store your watches in a safe place. Make sure to follow me on: Facebook: facebook.com/MAT2COMPOSITES Instagram: matthieu.libeert twitter: @matthieutje65 web: mat2composites.com